JEE 7, the next release of Java Enterprice for large application will include a standard WebSocket API for create realtime communication channel over a single TCP connection. The realtime communication allow server to push message to clients in realtime. This tutorial will teach step by step to create a realtime chat program using JEE7 WebSocket API. There are two ways to using JEE7’s WebSocket API, one is using annotations and another is using normal OO concept to extend classes. This tutorial will mainly focus on using annotations based API.
Maven Dependencies
Recommended way to manage Java Application’s dependencies is using maven. This tutorial will using maven to manage dependencies. Include the following snippet into your pom file dependencies section:
<dependencies>
    <dependency>
        <groupId>javax</groupId>
        <artifactId>javaee-web-api</artifactId>
        <version>7.0-b83</version>
        <scope>provided</scope>
    </dependency>
    <dependency>
        <groupId>javax.websocket</groupId>
        <artifactId>javax.websocket-api</artifactId>
        <version>1.0-rc5</version>
        <scope>provided</scope>
    </dependency>
</dependencies>
Note that the latest version of WebSocket API is rc5, to get the latest version, please browse to maven repo websocket to check out.
Annotation Usage
Before get start to use JEE7 WebSocket, let introduce the usage of the annotations:
| Annotation | Description |
|---|---|
| @ServerEndpoint | Annotate class as server end point |
| @OnOpen | Involked when new connection is established |
| @OnMessage | Involked when new message is received |
| @OnClose | Involked when existing connection is closd |
| @OnError | Involked when there is error in communication channel |
Chat Program
Based on the annotation usage, we can create a simple chat program using the following code:
package me.dreamand.blog.websocket;

import java.util.logging.Level;
import java.util.logging.Logger;
import javax.websocket.OnClose;
import javax.websocket.OnError;
import javax.websocket.OnMessage;
import javax.websocket.OnOpen;
import javax.websocket.Session;
import javax.websocket.server.ServerEndpoint;

@ServerEndpoint(value = "/chat")
public class ChatServer {

    private static final Logger LOGGER =
            Logger.getLogger(ChatServer.class.getName());

    @OnOpen
    public void onOpen(Session session) {
        LOGGER.log(Level.INFO, "New connection with client: {0}",
                session.getId());
    }

    @OnMessage
    public String onMessage(String message, Session session) {
        LOGGER.log(Level.INFO, "New message from Client [{0}]: {1}",
                new Object[] {session.getId(), message});
        return "Server received [" + message + "]";
    }

    @OnClose
    public void onClose(Session session) {
        LOGGER.log(Level.INFO, "Close connection for client: {0}",
                session.getId());
    }

    @OnError
    public void onError(Throwable exception, Session session) {
        LOGGER.log(Level.INFO, "Error for client: {0}", session.getId());
    }
}
HTML and Javascript For WebSocket
The next step is to create a client for the chat program. The browser must support WebSocket. The following shows the HTML, CSS, and JavaScript for the browser:
<!DOCTYPE html>
<html>
    <head>
        <title>JEE7 WebSocket Example</title>
        <meta http-equiv="Content-Type" content="text/html; charset=UTF-8">
        <link rel="shortcut icon" href="/websocket/favicon.ico">
        <style>
            #container {
                border: 1px #999999 solid;
                padding: 10px;
            }
            p.client {
                border-bottom: 1px aquamarine solid;
            }
            p.server {
                border-bottom: 1px crimson solid;
            }
            input {
                padding: 5px;
                width: 250px;
            }
            button {
                padding: 5px;
            }
        </style>
        <script>
            var chatClient = new WebSocket("ws://localhost:8080/websocket/chat");

            chatClient.onmessage = function(evt) {
                var p = document.createElement("p");
                p.setAttribute("class", "server");
                p.innerHTML = "Server: " + evt.data;
                var container = document.getElementById("container");
                container.appendChild(p);
            }
            function send() {
                var input = document.getElementById("message");
                var p = document.createElement("p");
                p.setAttribute("class", "client");
                p.innerHTML = "Me: " + input.value;
                var container = document.getElementById("container");
                container.appendChild(p);
                chatClient.send(input.value);
                input.value = "";
            }
        </script>
    </head>
    <body>
        <h1>JEE7 WebSocket Example</h1>
        <div id="container">

        </div>
        <input type="text" id="message" name="message" />
        <button type="button" id="send" onclick="send()">Send</button>
    </body>
</html>
Running JEE7 WebSocket Appliction
To run JEE7 WebSocket enabled application, this tutorial is deploy to GlassFish 4.
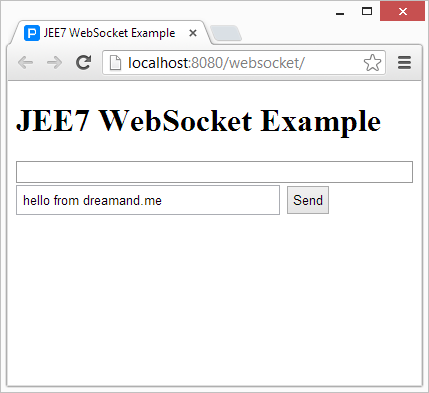
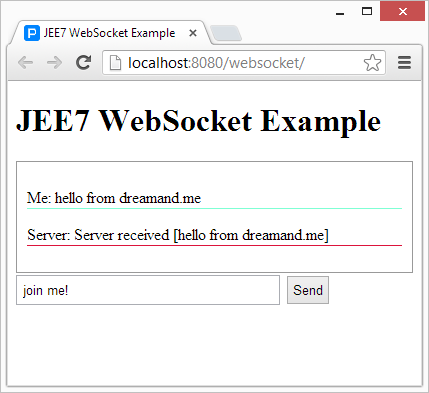
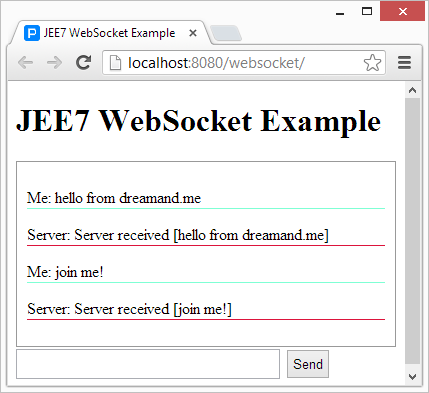
The following screenshot show the UI and server log for the program:


Conclusion
JEE7 is joining the new HTML5 wave for WebSocket for duplex comunication channel. Realtime commication is one of the essential aspect for enterprise application, now with native support without AJAX pooling. In the near future will have large scale applications deploy to use this feature.